
Twitter is among the hottest social media platforms and is broadly adopted by varied communities and customers from completely different industries. However like most current social media platforms, Twitter is centralized. Positive, the social media big is implementing some crypto options, similar to utilizing NFTs (non-fungible tokens) as profile footage. Nonetheless, customers of the platform face censorship, account blocking, shadowbanning, and so forth., each day. Happily, Web3 supplies glorious options for these points. Due to this fact, we determined for example how one can create a decentralized Twitter in lower than 90 minutes. To ensure you can accomplish constructing a decentralized Twitter effortlessly and that the method goes easily, we’ve damaged down our article into 4 phases:
- Deploying a Sensible Contract to Tweet on the Blockchain
- Constructing the Frontend of Our Decentralized Twitter
- Constructing the Backend of Our Decentralized Twitter
- Dealing with Off-Chain and On-Chain Information with the Moralis Dashboard
If you happen to determine to tackle right now’s quest, you’ll find yourself with your individual occasion of a decentralized Twitter. Nonetheless, that may simply be “the cherry on high”. A fair better worth awaits you within the type of data and expertise you’ll acquire alongside the way in which. For one, you’ll learn to use Remix to create and deploy sensible contracts. Additionally, you will get acquainted with Moralis – one of the best Web3 backend platform. This “Firebase for crypto” platform will save us numerous time as it’s going to allow us to cowl our dapp’s backend wants with quick snippets of code. Moreover, this pinnacle of the present Web3 tech stack can even make it easier to index the blockchain and off-chain knowledge. Nonetheless, by taking over this instance venture, additionally, you will get to refresh your React expertise. Sure, JavaScript proficiency is all you’ll want to change into a Web3 developer.
Decentralized Twitter – Demo
Earlier than we take you by the hand and present you the best way to construct a Web3 Twitter clone, you deserve some extra perception. As such, we ready a fast demonstration of our decentralized Twitter. The latter will make it easier to determine whether or not or not you wish to roll up your sleeves to finish the above-listed 4 phases transferring ahead.
So, right here’s what the touchdown web page of our decentralized Twitter appears to be like like:

If you recognize a factor or two about decentralized purposes (dapps), you recognize that Web3 authentication is a vital half. Happily, varied respected Web3 wallets make that somewhat easy. As such, a click on on the “Join Pockets” button presents customers to decide on their favourite Web3 login device:
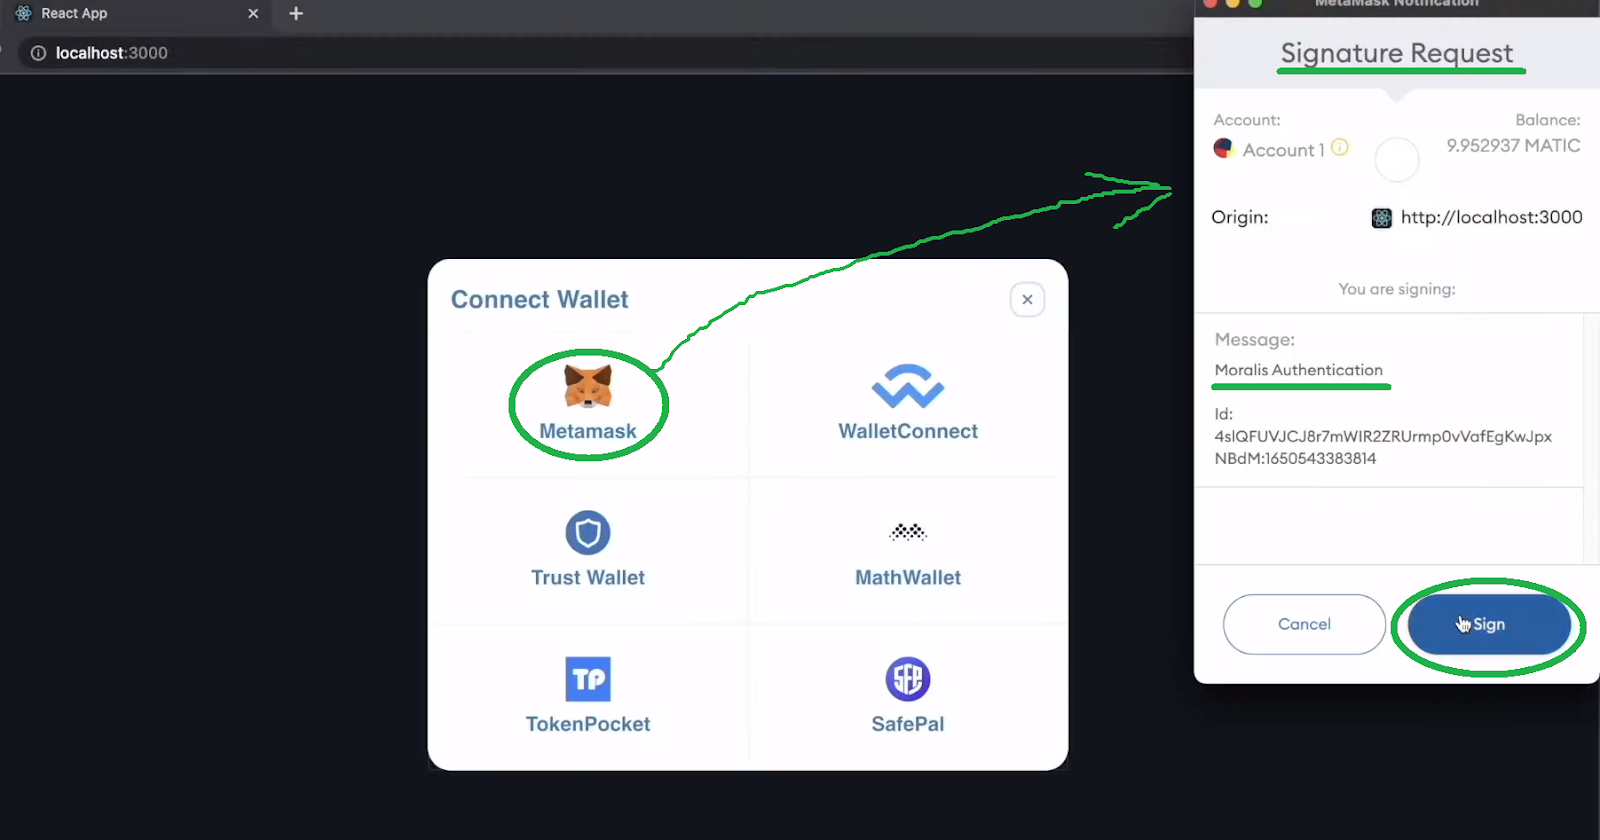
As you may see within the screenshot above, the instance person decides to authenticate with MetaMask. When the person clicks on the MetaMask icon, this pockets’s extension pops up, requesting the person’s signature. After clicking on the “Signal” button, the person lands on our decentralized Twitter homepage:
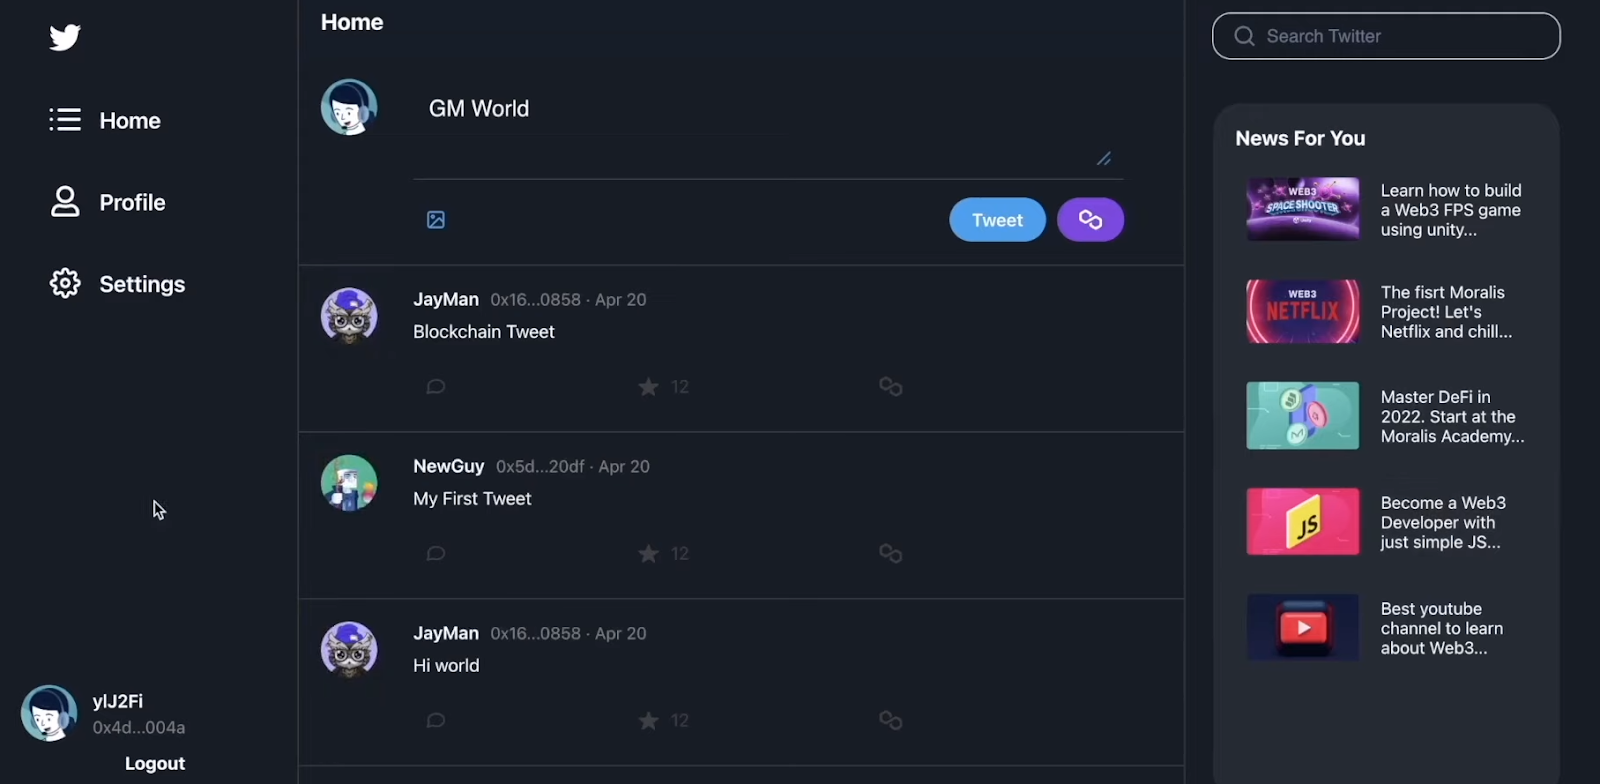
As well as, that is the instance person’s first time logging in to our dapp. Accordingly, his profile has been assigned the default person icon. After all, he can change it simply (see beneath). Additionally, the person already sees the most recent tweets within the heart of the homepage feed. Nonetheless, earlier than interacting with it, the person ought to full the preliminary profile setup. Thus, the person selects the “Profile” tab, adopted by a click on on “Edit profile”:
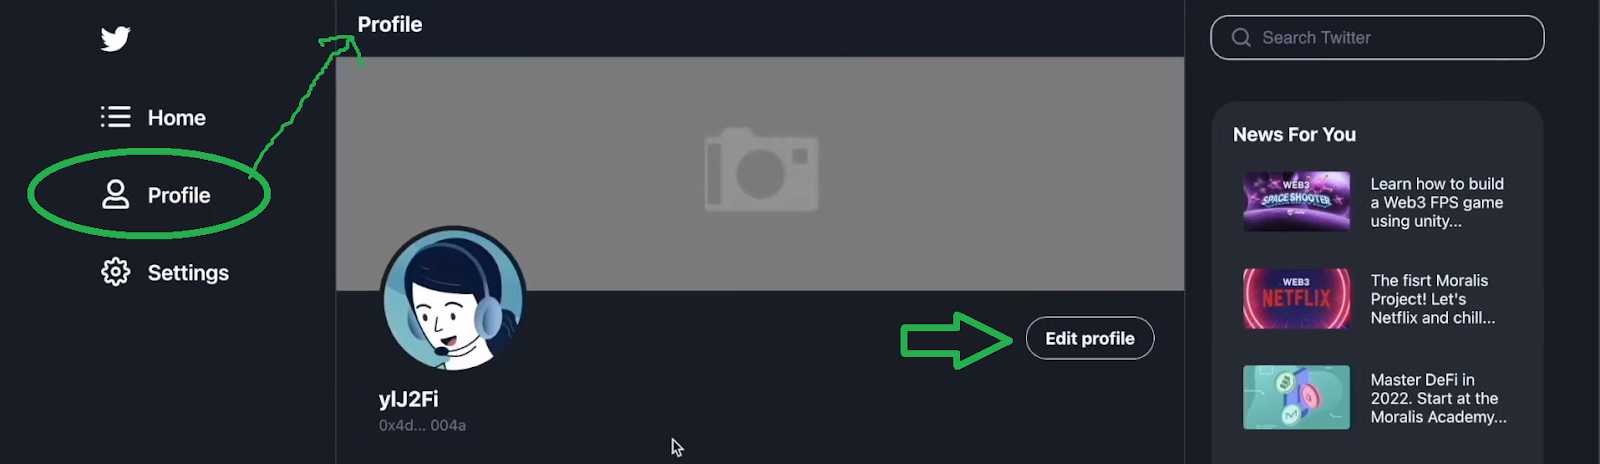
That is the place customers enter their names and bio. Right here, we included a characteristic that lets customers select their NFTs as their profile footage:
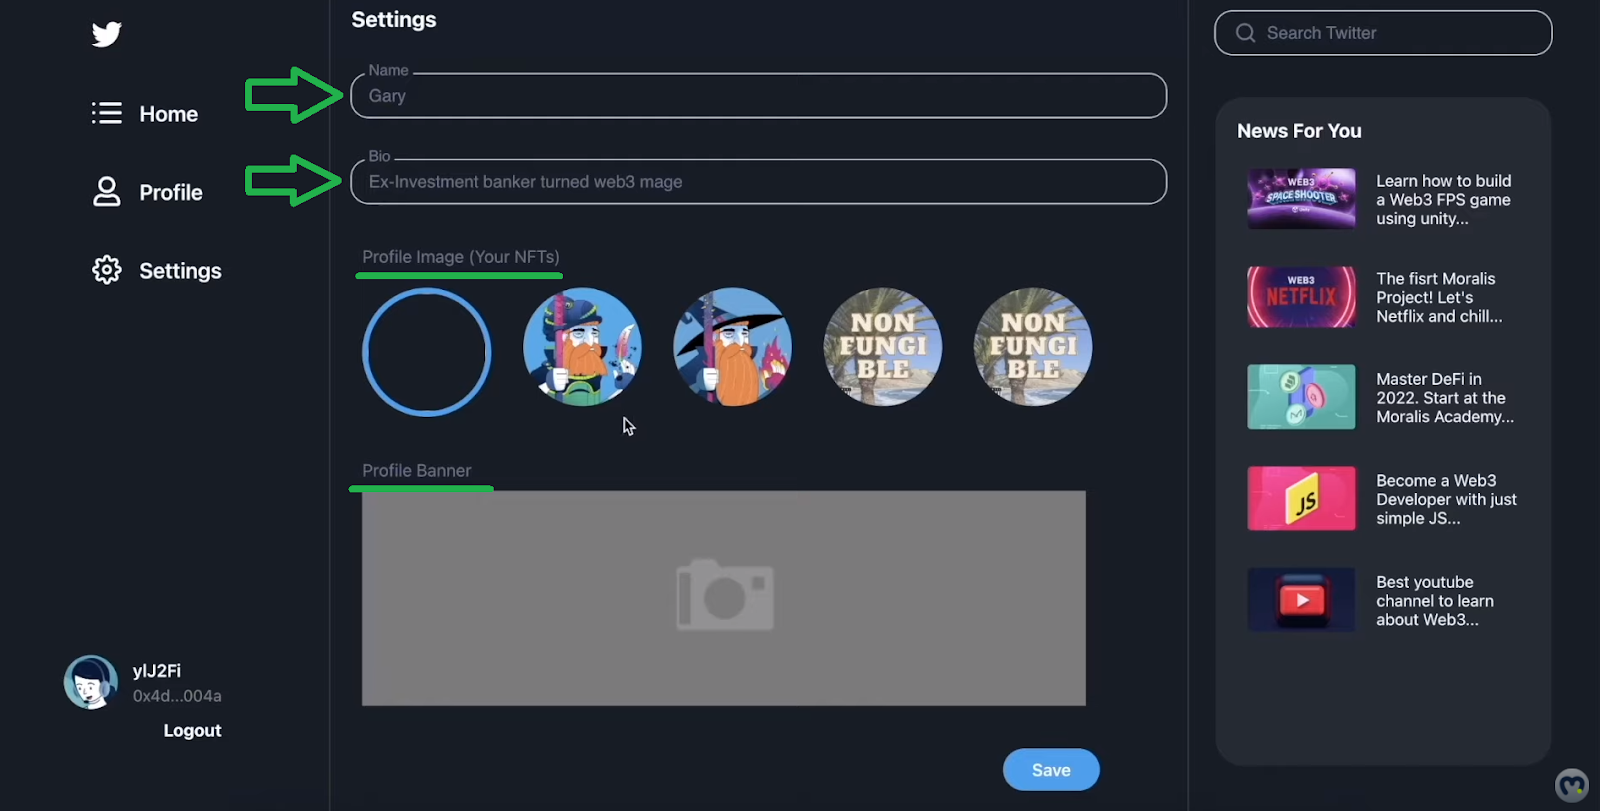
The “Profile” settings additionally enable customers to personalize their banners. Once they click on on the grey space above, they get to add their banner footage. Lastly, customers have to click on on the “Save” button:
Demonstrating Tweeting in Our Decentralized Twitter
To create and submit a tweet, customers have to click on on the “Dwelling” button of our decentralized Twitter:
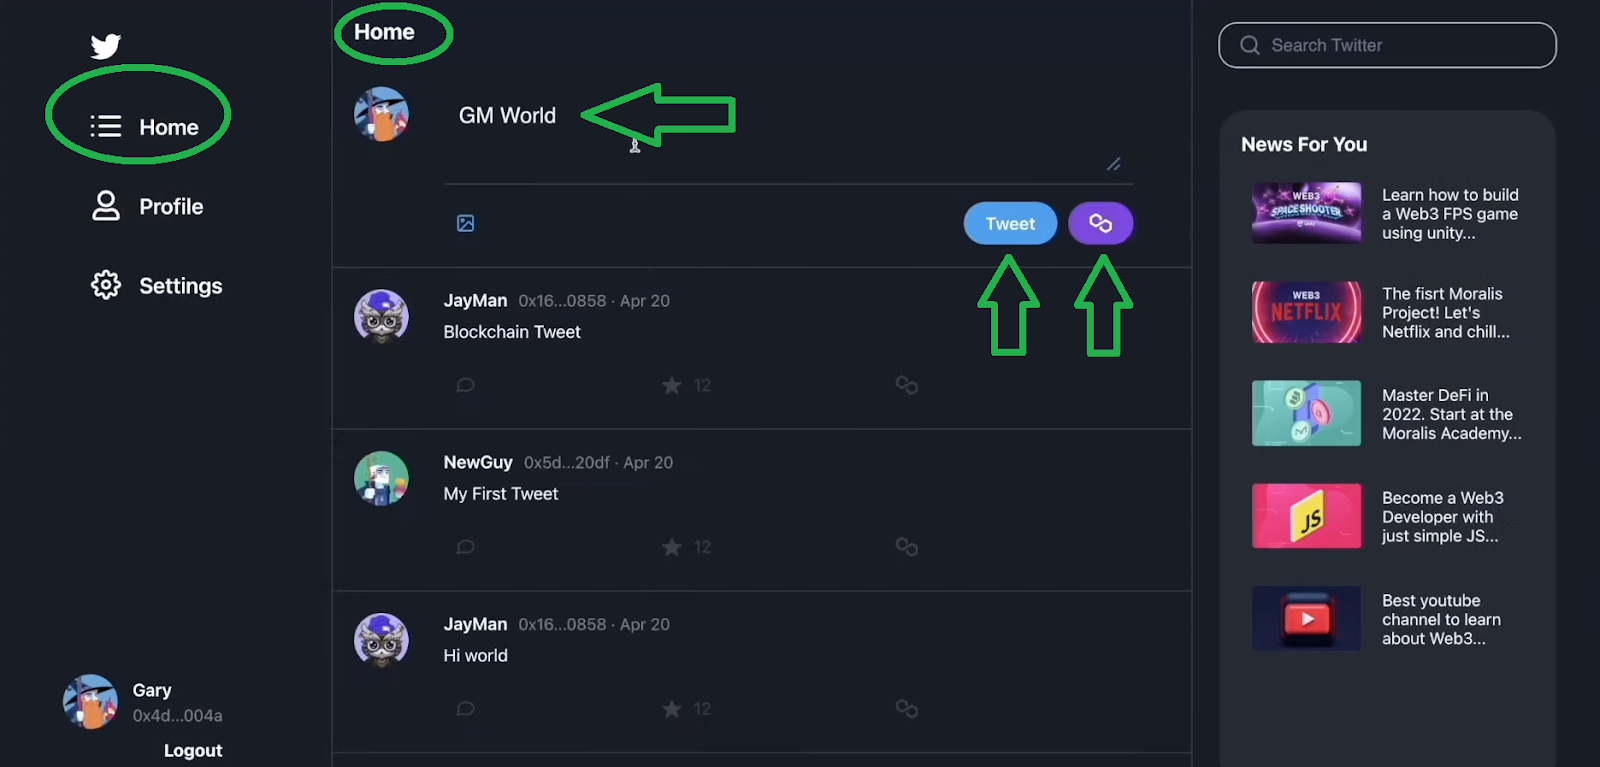
As soon as on the homepage, customers can begin typing after clicking on the textual content entry discipline (“GM World”, as seen above). In addition they have an opportunity so as to add a picture to their tweets through the “picture” icon. Moreover, customers can do an off-chain or an on-chain tweet. Within the case of the latter, their tweets might be saved on the blockchain.
Word: For the sake of this instance venture, we used Polygon’s Mumbai testnet. Accordingly, we use the Polygon icon for the “tweet on-chain” button.
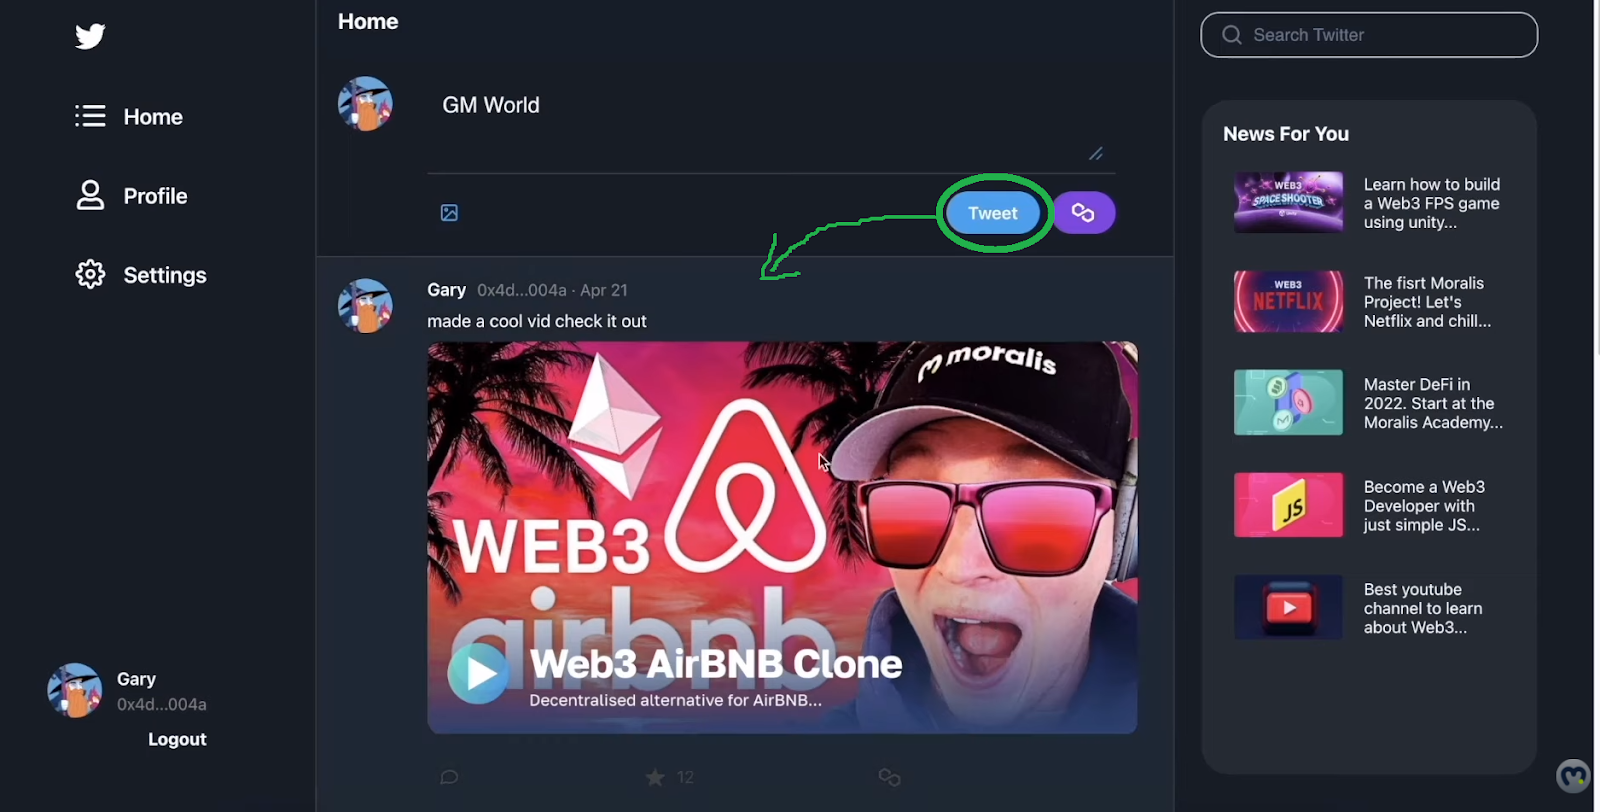
Customers should use the “Tweet” button when off-chain tweets are in query. By doing so, their new tweet seems within the tweet thread nearly immediately:
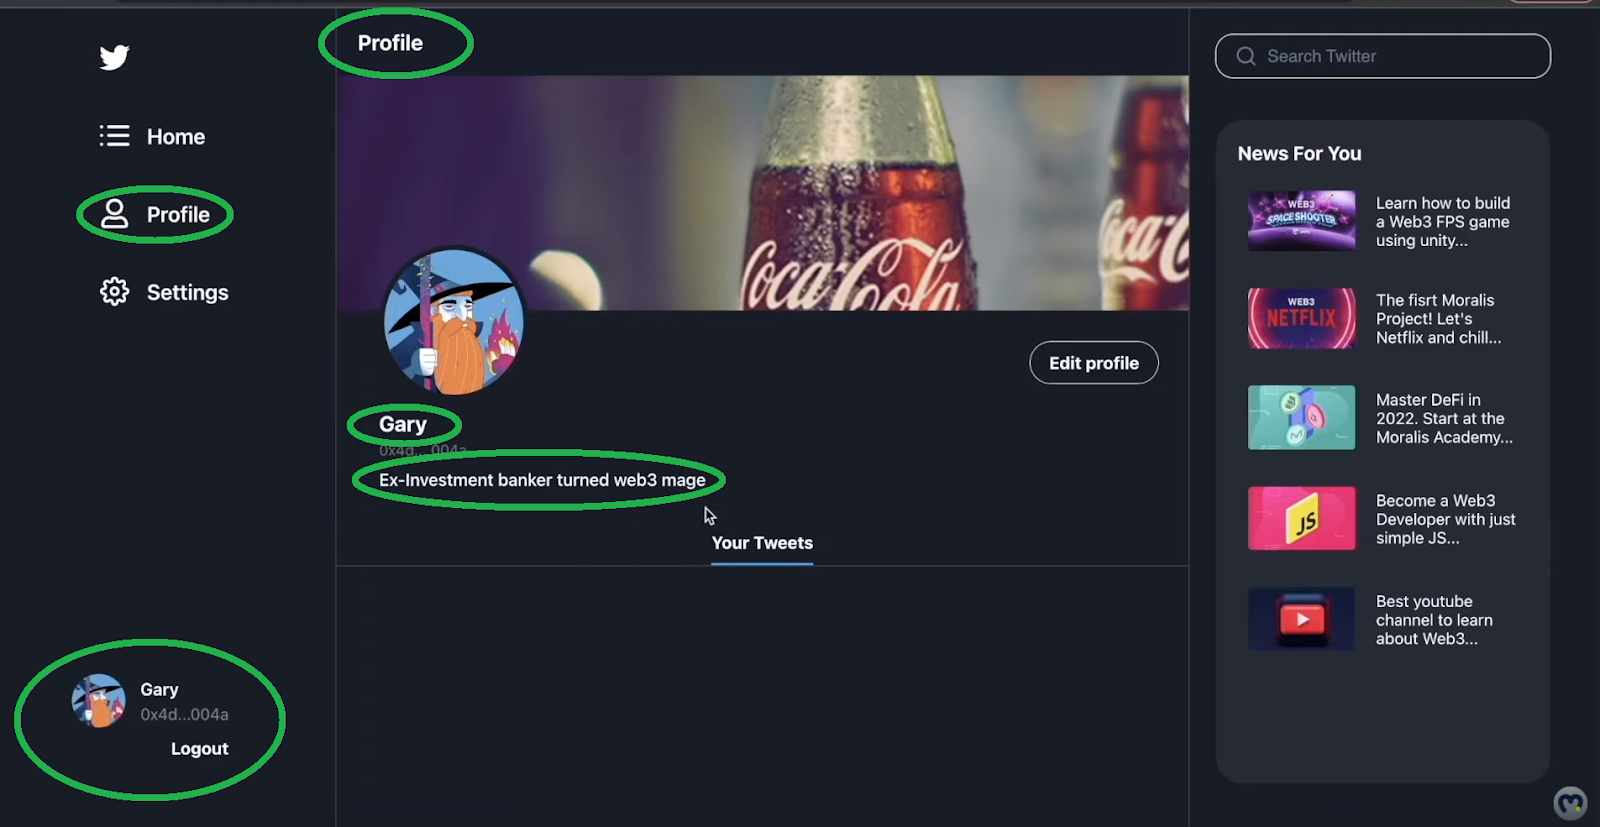
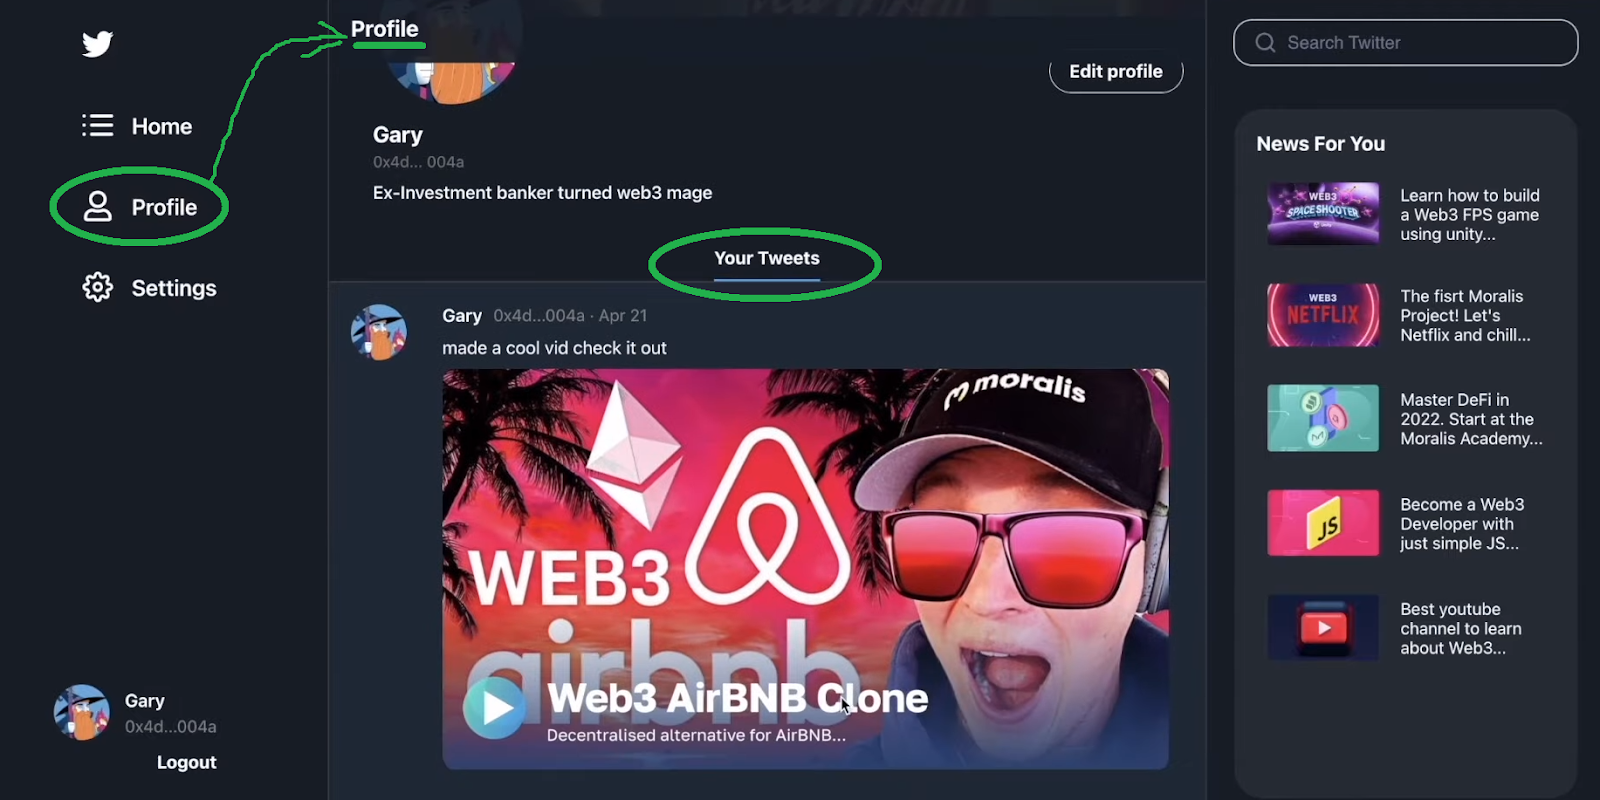
As well as, after tweeting, customers will see their tweets inside their profile tab (“Your Tweets” part):
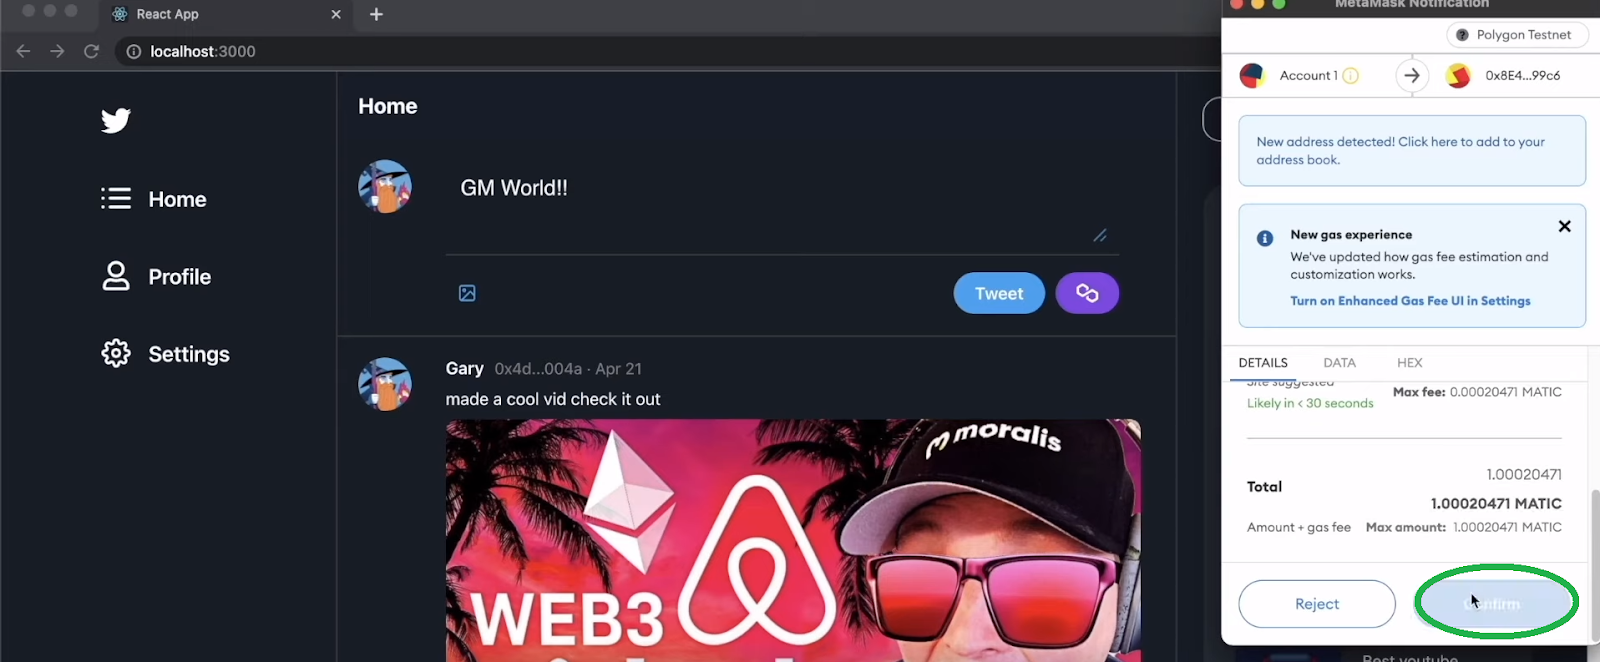
After all, when customers wish to submit their tweets on the blockchain, they should click on on the “Polygon” button:

As indicated within the screenshot above, this motion prompts their Web3 pockets extensions. Therefore, they should verify the “tweet” transaction. For our decentralized Twitter, customers have to pay one MATIC to avoid wasting their tweets on the chain:
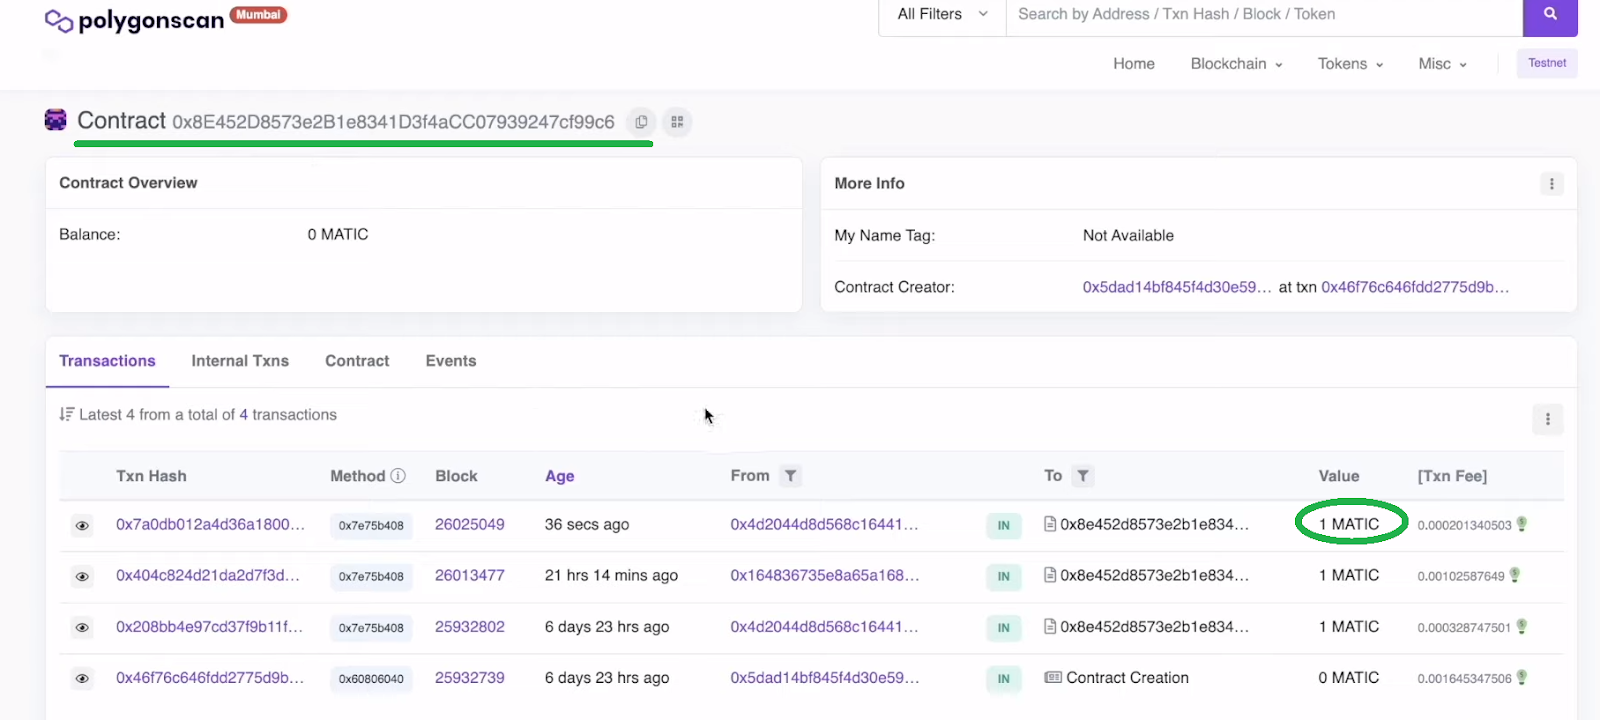
The confirmed transactions often get processed inside seconds. As quickly as that occurs, customers’ on-chain tweets additionally seem on the homepage’s tweet thread:

We additionally wish to verify that the above tweet obtained saved on the blockchain. Thus, we use PolygonScan (testnet) to look our sensible contract’s deal with. Therefore, we are able to view the above-presented transaction:
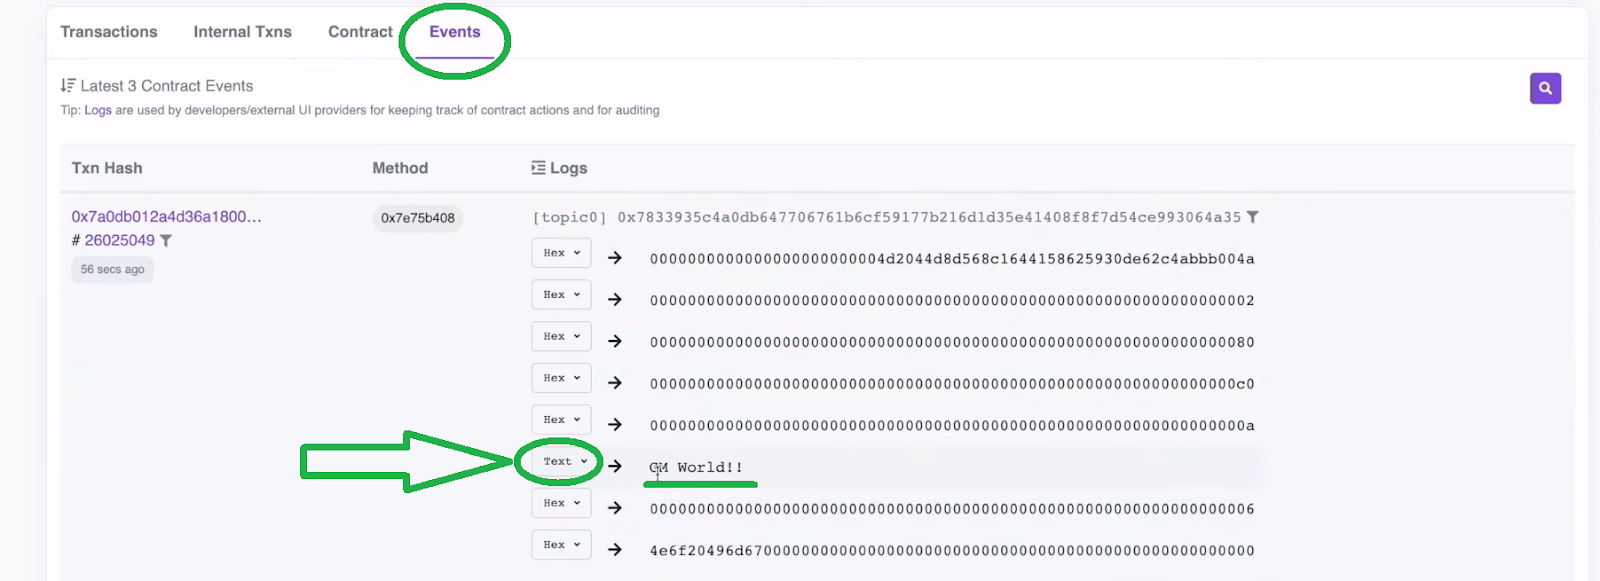
The “Occasions” tab allows us to see our instance tweet. Nonetheless, to see its content material in textual content format, we should flip “Hex” into “Textual content”:
Constructing a Decentralized Twitter in Much less Than 90 Minutes
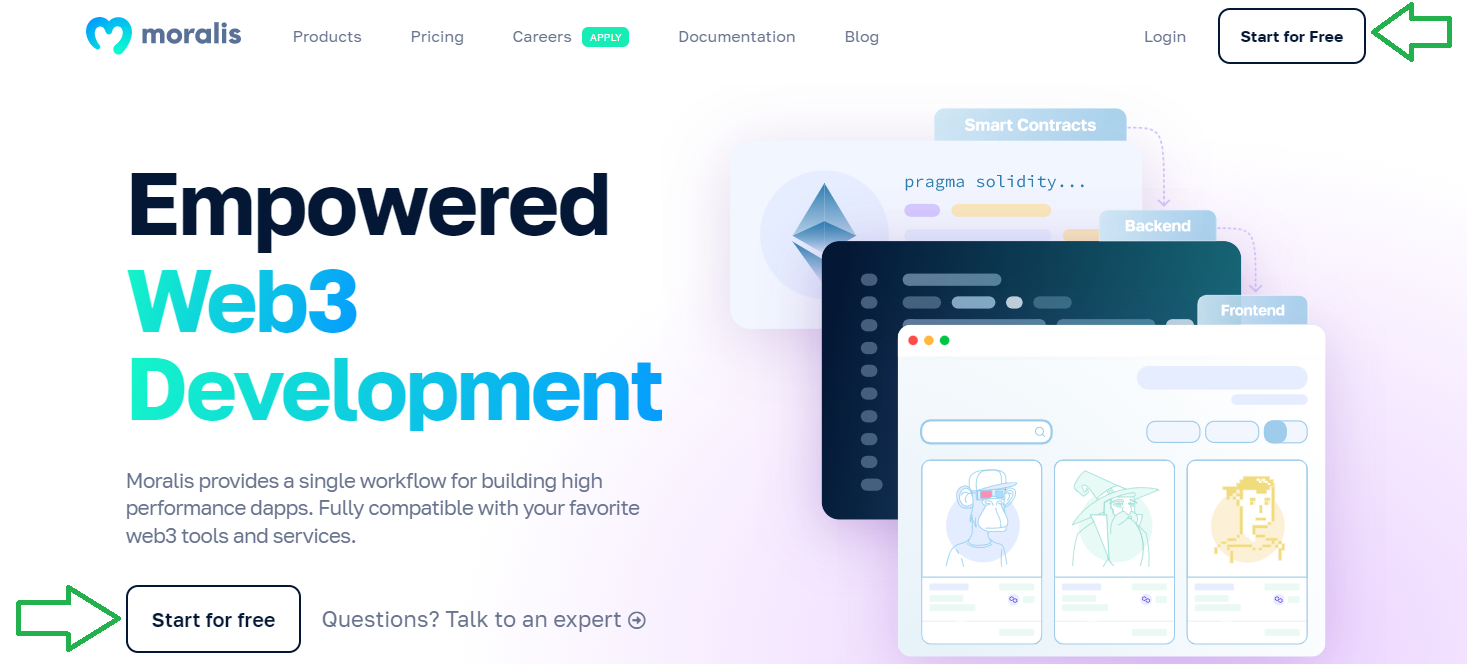
Those that determined to get their fingers soiled will now learn to full the 4 phases of our “constructing a decentralized Twitter” quest. You’ll begin by deploying our “on-chain tweeting” sensible contract utilizing Remix. Since you may copy our contract’s code, you don’t have to fret about your Solidity expertise. Then, you’ll use React to construct the frontend of our decentralized Twitter. Lastly, you’ll unleash the ability of Moralis’ SDK to cowl the backend options. Happily, you get to create your free Moralis account, which supplies all you’ll want to construct a decentralized Twitter.

Word: Since movies can present much more than screenshots, we’ll embody timestamps transferring ahead. Bounce to every timestamp within the video on the backside of this text. You’ll have an opportunity to comply with an in-house Moralis skilled’s lead and full our venture in lower than 90 minutes. Nonetheless, begin by cloning our code. Use the last code if you wish to discover the completed Twitter clone. Though, we encourage you to make use of the starter code and implement the remainder of the code, following our lead.
Stage 1 – Deploying a Sensible Contract to Tweet on the Blockchain
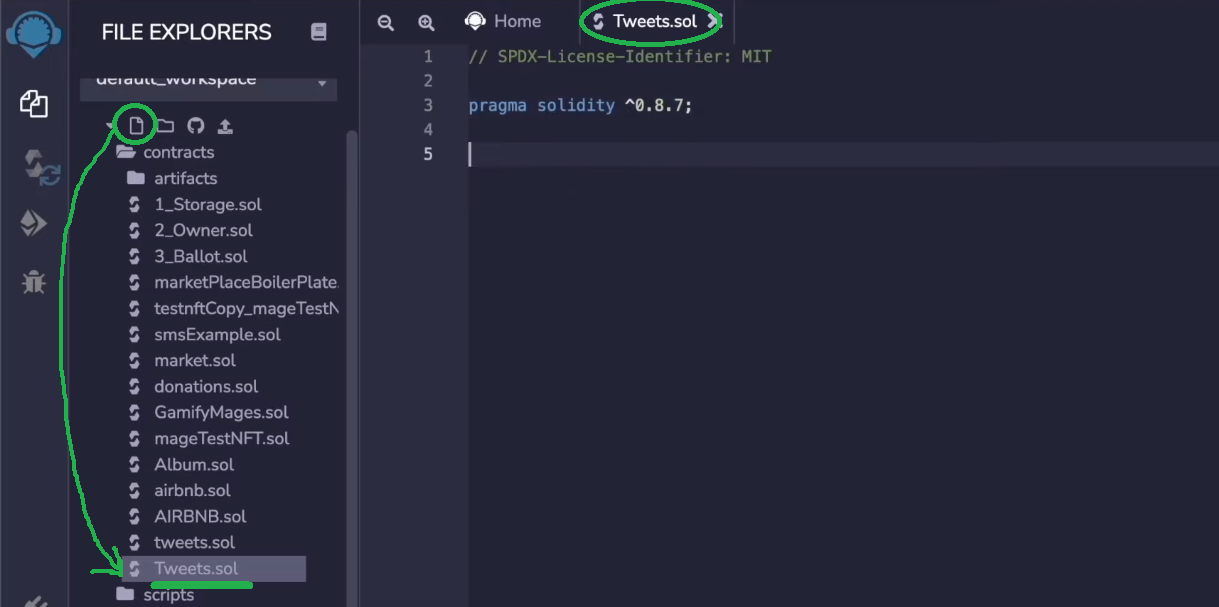
In terms of finishing on-chain transactions, sensible contracts are doing the heavy lifting behind the scenes. So, to cowl the “on-chain tweeting” characteristic of our decentralized Twitter, we have to create and deploy a Web3 contract. For particulars, use the video beneath beginning at 4:42. Begin by opening the Remix IDE. Subsequent, create a brand new file and title it “tweets.sol“:
As with all contracts, we should first add a “pragma” line. Nonetheless, as talked about above, you need to use the “tweets.sol” hyperlink and duplicate the whole code and paste it into Remix. Then, it’s time to compile your sensible contract (use the video beneath at 15:51):

When you’ve compiled your sensible contract, you need to use Remix to deploy it. Don’t overlook to have your MetaMask extension related to Polygon’s testnet (Mumbai). Additionally, ensure to pick the “Injected Web3” surroundings:
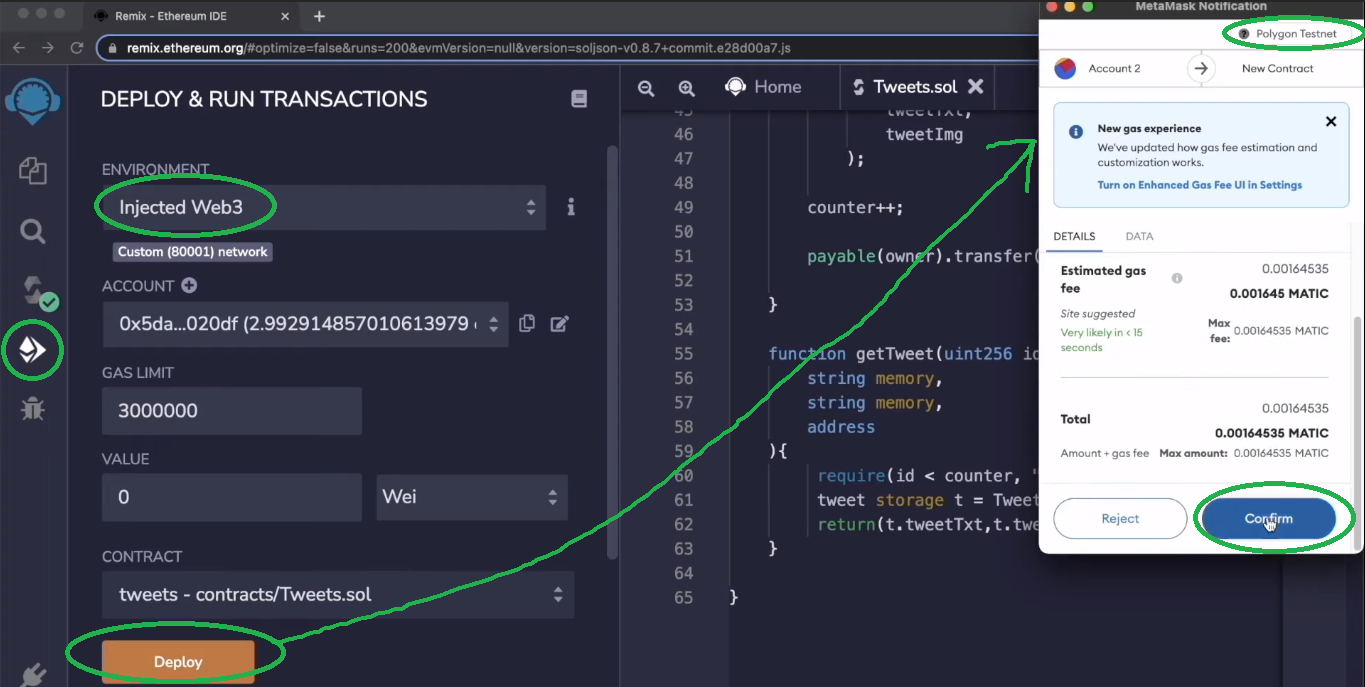
Word: To deploy your sensible contract on the Mumbai testnet, you have to some “play” MATIC. As such, use the Mumbai testnet faucet.
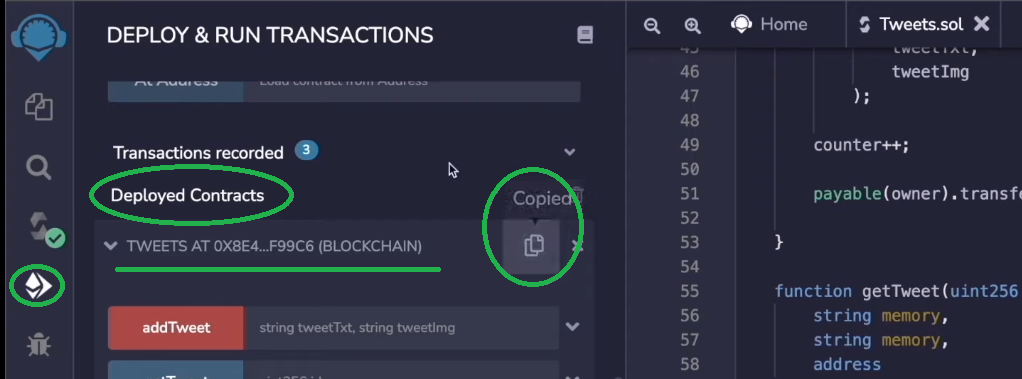
After efficiently deploying your sensible contract, you may copy its deal with. You have to the latter as you progress ahead:
Stage 2 – Constructing the Frontend of Our Decentralized Twitter
Along with your occasion of the “tweets” sensible contract deployed, you may give attention to constructing a good person interface (Web3 UI). That is the place React turns out to be useful. As an extra shortcut, we encourage you to make use of Moralis’ web3uikit. Detailed steerage awaits you at 20:15 of the video tutorial beneath.
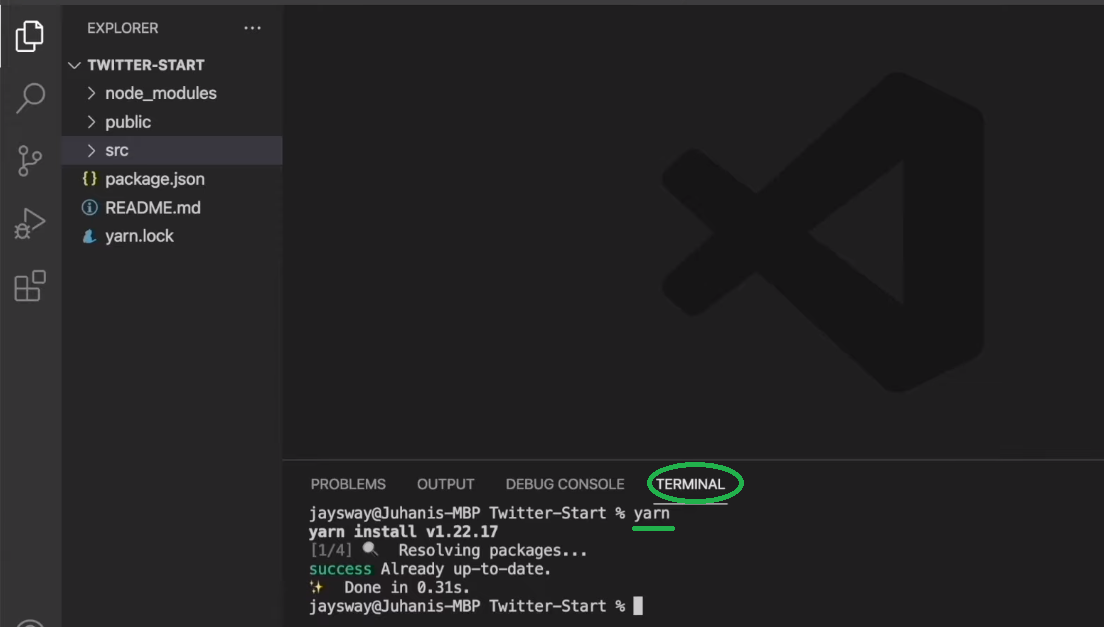
For starters, you’ll get to finish the preliminary venture setup. Therefore, you’ll first wish to clone our code and set up all dependencies. You are able to do this utilizing Visible Studio Code (VSC) or another code editor:
Beginning at 22:41, you’ll study to construct your decentralized Twitter sidebars. As such, you’ll use the “Sidebar” part to simplify issues and have the sidebar prepared in lower than ten minutes:
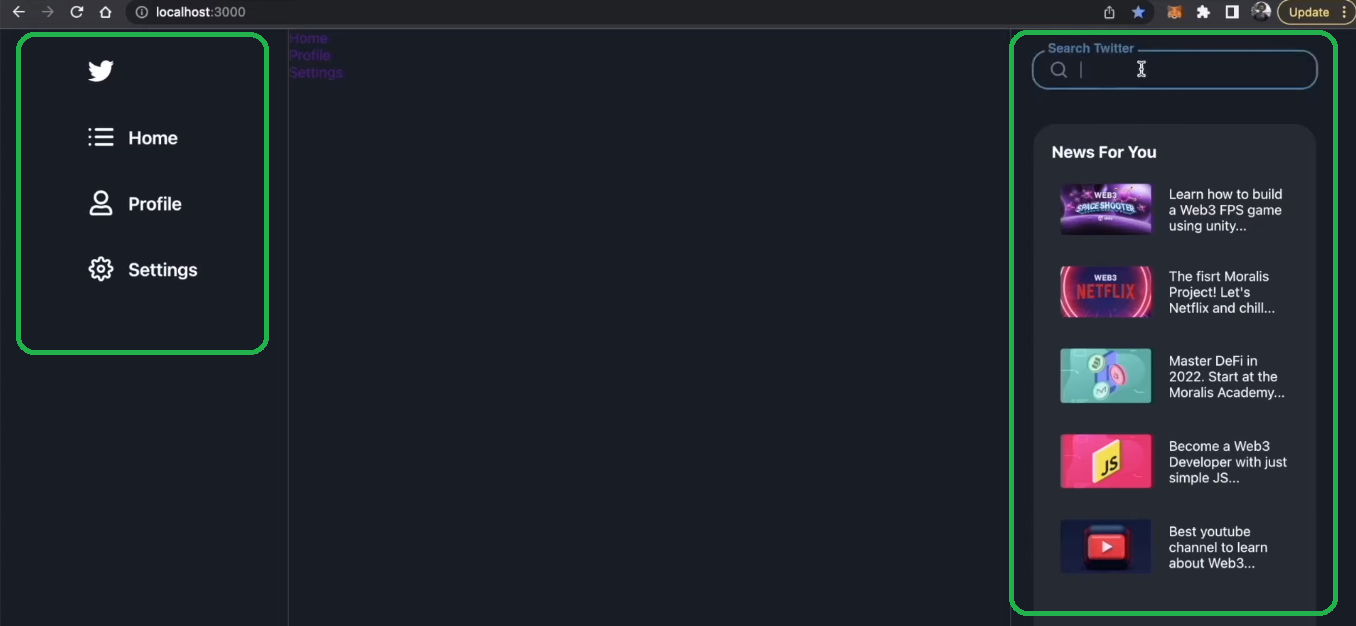
With the sidebars prepared, you’re going to get to construct the homepage beginning at 31:44. The “Dwelling.js” file will maintain the vast majority of the code. That is the place you’ll program the right logic. Furthermore, utilizing web3uikit will make including icons, buttons, and the textual content space as simple because it will get. As well as, the video tutorial can even present you the best way to neatly incorporate the importing of the photographs. As such, you’ll have the “tweeting” space set in place very quickly.
Transferring ahead, you’ll create your decentralized Twitter feed. That is the place you’ll give attention to the “TweetInFeed.js” file. Lastly, you’ll wrap up your frontend efforts by including the “Profile” and “Settings” pages.
Stage 3 – Constructing the Backend of Our Decentralized Twitter
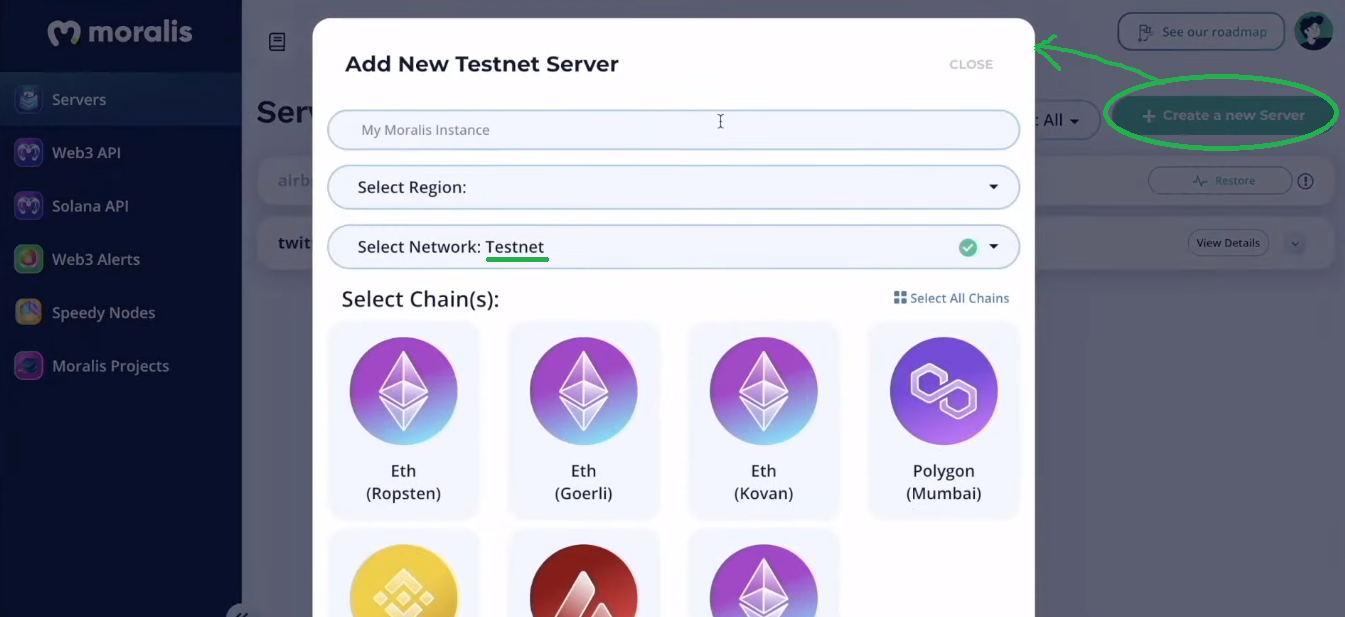
With the frontend accomplished, it’s best to add Web3 performance to create a decentralized Twitter. As such, ensure to make use of the video information beneath beginning at 57:29. As talked about earlier than, that is the place Moralis will make issues fairly easy for you. Though, you do want to finish some preliminary setups. As such, log in to your Moralis account to entry the “Servers” tab inside your Moralis admin space (57:46). There, you’ll want to create your Moralis server:
After efficiently spinning up your server, you get to make use of its particulars (server URL and software ID):
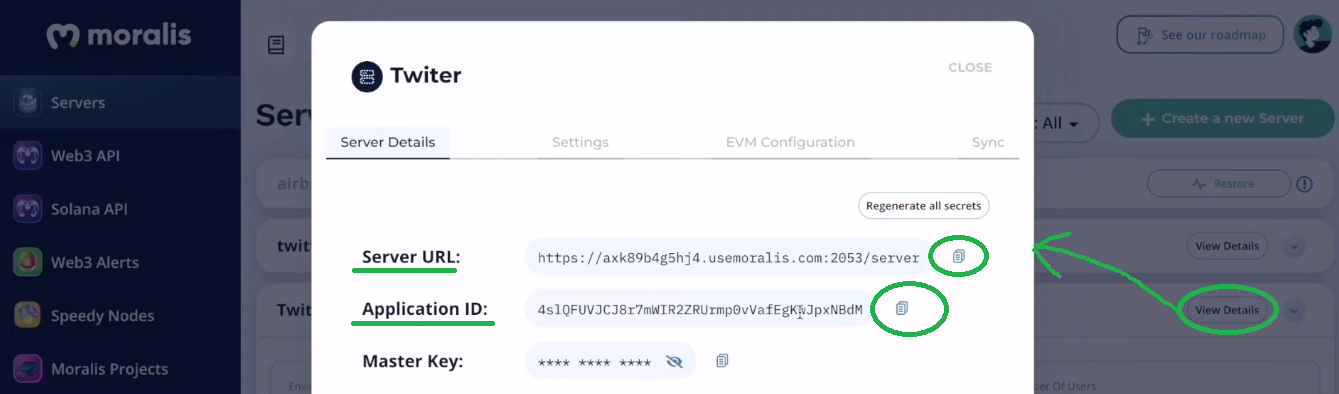
Lastly, open the “index.js” file and populate the marked line (as seen beneath) together with your server’s particulars:
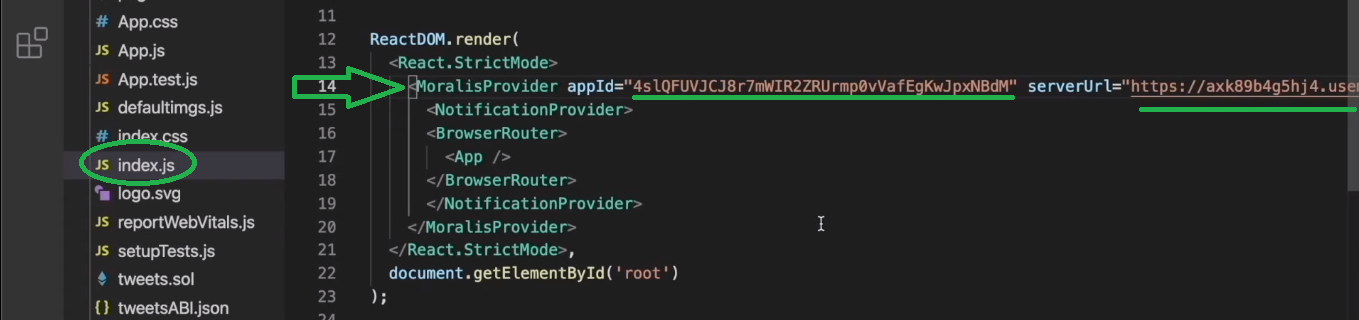
The above step offers you entry to the Moralis SDK. Now you can use the Moralis documentation to repeat correct hooks (e.g., “isAuthenticated”). That method, you’ll simply cowl the whole Web3-related backend, together with Web3 authentication. That is the place you’ll use web3uikit, which is able to give you a neatly trying “Join Pockets” button. Whereas implementing these options, you’ll primarily give attention to the “App.js” file.

Stage 4 – Dealing with Off-Chain and On-Chain Information with the Moralis Dashboard
Final however not least, beginning at 1:00:59, you’ll study to make use of the Moralis dashboard. As such, you’ll be capable of retailer off-chain knowledge and on-chain knowledge with ease. For this last stage of our instance venture, you’ll use the “Settings.js” file to add to IPFS. You’ll see how the Moralis integration of IPFS lets you save recordsdata in a decentralized method. For our decentralized Twitter, we’ll use this feature to avoid wasting the picture recordsdata that customers wish to tweet. Alongside the way in which, you’ll get to make use of the “useMoralis” and “useMoralisWeb3Api” strategies. They may allow you to create the “saveEdits” async operate and to make the most of “useEffect” and “getNFTs”. Lastly, you’ll implement the code to allow “on-chain” tweeting (1:12:40). That is the place the Moralis dashboard’s “Tweets” class will play a significant function.
2022 Information to Constructing a Decentralized Twitter – Abstract
If you happen to took on the above-presented instance venture, you now have your individual decentralized Twitter up and working. You’ve discovered to make use of your current JavaScript and React expertise to create a comparatively superior dapp. Moreover, with the assistance of wonderful instruments similar to Remix and Moralis, you had been capable of cowl blockchain elements with out breaking a sweat. Nonetheless, now that you recognize that blockchain growth with the best instruments and correct steerage isn’t any massive deal, it’s best to tackle different instance initiatives. As an example, you may dive into our different “clone” feats. These embody constructing a Uniswap DEX clone, a Web3 Netflix clone, a Web3 Spotify clone, a Reddit clone for Web3, an OpenSea clone, and a Coinbase clone.
Moreover, you could wish to discover different crypto and blockchain growth subjects. In that case, take a look at the Moralis weblog and the Moralis YouTube channel. A few of the newest articles and tutorials there embody an EIP 1559 instance, the complete decentralized finance information, the “mint recreation property as NFTs” tutorial, constructing a decentralized autonomous group (DAO), fractional NFTs, SPL vs ERC20 tokens, constructing a Solana token dashboard, creating your individual metaverse, constructing a play-to-earn (P2E) recreation sensible contract, and making a BNB NFT. Furthermore, if you’re Unity proficient, ensure to discover Unity Web3 programming. As well as, you may find out about Web3 recreation design by constructing a Web3 recreation that allows gamers to purchase NFTs in-game.
Nonetheless, you could be wanting to change into a blockchain developer as quickly as potential. If that’s the case, you’ll want to think about taking a extra skilled method. Therefore, enrolling in Moralis Academy could be simply the best path for you.


