
Would you prefer to know the way next-gen Unity builders are importing Web3 Unity metadata? If that’s the case, you’ve come to the fitting place. Though we at the moment are in a “Web2 and Web3” hybrid period, the development is clearly in the direction of elevated adoption of Web3. This contains incorporating decentralized parts and options in each approach doable to create actually decentralized apps. This contains belongings and the way we, as builders, deal with them in our Web3 recreation design. Additionally, when creating video games by way of Unity Web3 programming, we should make the most of non-centralized instruments when importing Web3 Unity metadata. We will accomplish this if we add Unity belongings to IPFS (a decentralized storing protocol). In case your reply is “sure” to the query said on the outset of this text, learn on!
Herein, we’ll give attention to our “Unity IPFS uploader” dapp (decentralized utility). First, you’ll get to see a fast demo of the dapp. Then, we’ll present you what you have to do to make use of our dapp to your Web3 Unity metadata importing functions. We may even information you thru the preliminary Moralis setup course of. The latter can be your gateway to the “add to IPFS” characteristic. As well as, for a deeper understanding, we’ll stroll you thru the code powering our “uploader” dapp. Now, if that is your first time listening to about Moralis, you’ll get to study extra about its platform as we transfer on. You’ll study what makes it the last word Web3 backend platform and the way it might help you save as much as 87% of growth time. Nonetheless, create your free Moralis account now, as you’ll want it to add Web3 Unity metadata.

Importing Web3 Unity Metadata and Belongings to IPFS – Demo
Figuring out how our dapp works will allow you to resolve whether or not or not you wish to use it your self. Therefore, we’re beginning the “Web3 Unity metadata” subject with a fast and easy demonstration:
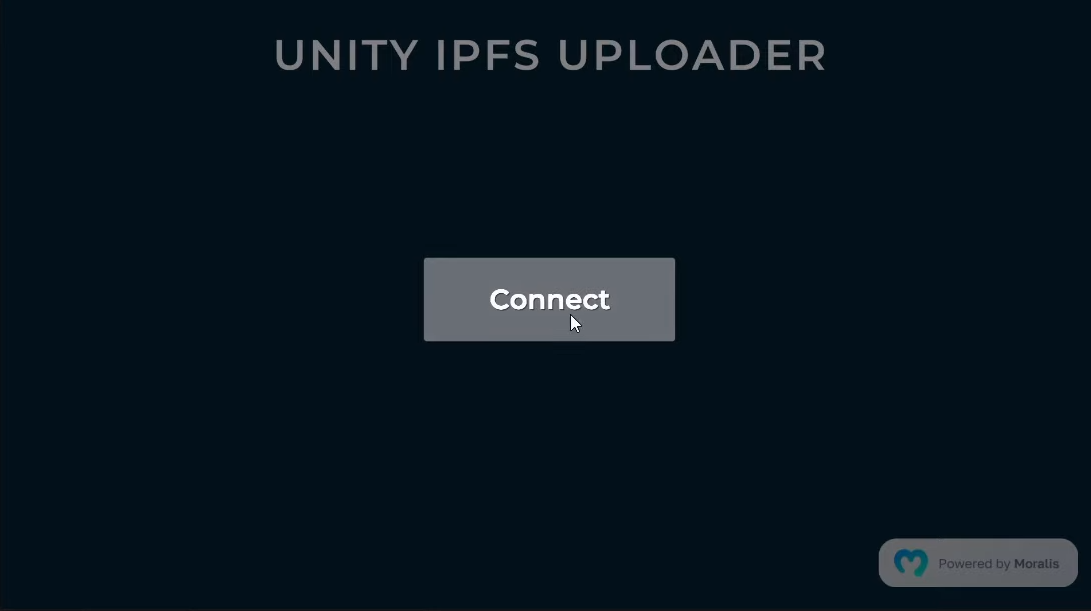
The above is a screenshot of our “Unity IPFS uploader” dapp’s preliminary display. As clearly indicated, customers should first join their Web3 wallets by clicking on the “Join” button. After doing so, the dapp shows a QR code that customers must scan utilizing their crypto wallets:
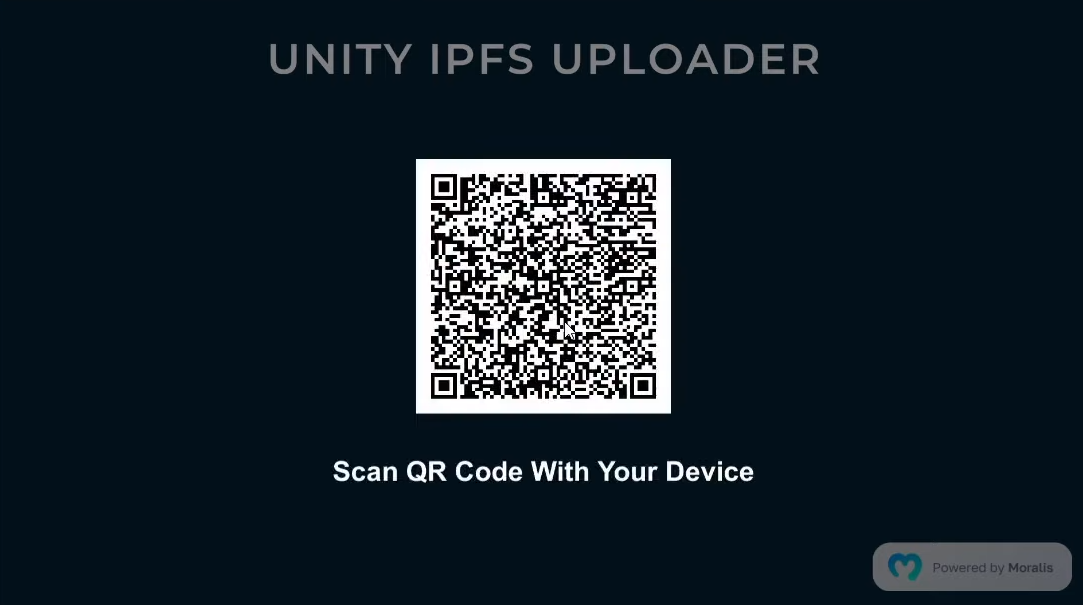
Since most customers nonetheless desire to authenticate with MetaMask, our demo focuses on utilizing MetaMask. Nonetheless, that is accomplished with a cell machine, which you’ll’t see within the screenshots. After scanning the code, the “Signing With Your Pockets” message seems on the display, which signifies the Web3 login course of:

Subsequent, customers should affirm their Web3 authentication inside their wallets by “signing” the affirmation message. As quickly as they click on on the “Signal” button on their cell units, they see the core of our dapp:

The above screenshot reveals the interface designed to add Web3 Unity metadata and belongings to IPFS. As such, let’s see tips on how to do exactly that on a picture instance file.
Importing Information and Their Metadata
Wanting on the screenshot above, you possibly can see the “Disconnect” button within the top-right nook. That is the place customers must click on as soon as they wish to signal (disconnect their crypto pockets). Then again, if we give attention to importing a file to IPFS, two buttons do the trick: “choose” and “add”. Clearly, earlier than customers can add a file, they should choose it. As such, they should click on on the “choose” button, which brings up a pop-up window:

Notice: We constructed our instance dapp with a give attention to picture information (PNG). Nonetheless, you should utilize the identical dapp to add different sorts of information and their metadata to IPFS.
Because the above screenshot demonstrates, customers must click on on a picture to pick it after which use the “Open” button. As soon as the file has been chosen, our dapp collects its particulars. Furthermore, it additionally generates a preview of the file (sprite) beneath the “choose” button:

Nonetheless, the add button is locked till customers enter the file’s identify and outline. Nonetheless, as quickly as customers enter the file’s particulars, they will use the “add” button. By doing so, the mechanism of our dapp uploads the file to IPFS. It additionally creates that file’s net Unity metadata, which comes within the type of a “.JSON” file. Moreover, the dapp additionally shops that metadata to IPFS and offers customers with belongings’ URLs. Therefore, customers can view the add file and its metadata in a browser:


Notice: These of you preferring demonstrations within the type of movies can view the clip beneath on this article.

Importing Web3 Unity Metadata with Moralis
As we transfer ahead, we’ll present you tips on how to set issues up to make use of the above-presented dapp and add Web3 Unity metadata to IPFS. Additionally, that is the place we’ll use Moralis. This pinnacle of the present Web3 tech stack is what permits frontend builders to create killer dapps with ease. Furthermore, this “Firebase for crypto” platform takes all the restrictions of RPC nodes out of the image.
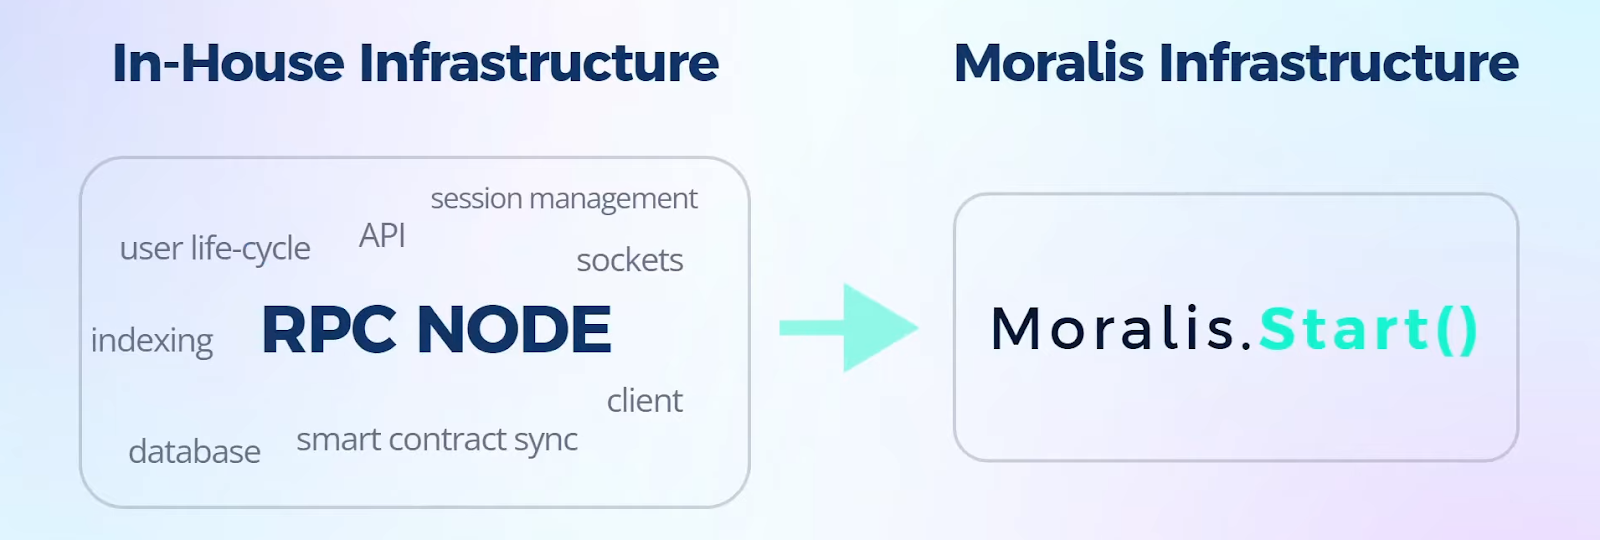
Moralis provides a single workflow that makes blockchain programming so simple as doable. The method usually begins with Web3 authentication, and that is the place Moralis provides a number of choices. Utilizing brief snippets of code, you possibly can even do Web3 authentication by way of e-mail or implement Web3 social login. Consequently, you possibly can enhance your Web3 consumer onboarding and even begin to discover Web3 with out MetaMask. As well as, Moralis establishes classes and creates identification profiles for authenticated customers. It shops these items of data in a real-time on-chain database (Moralis dashboard). With the assistance of this database, you get to index the blockchain effortlessly. On the similar time, you could use the Moralis dashboard to retailer off-chain information as nicely.

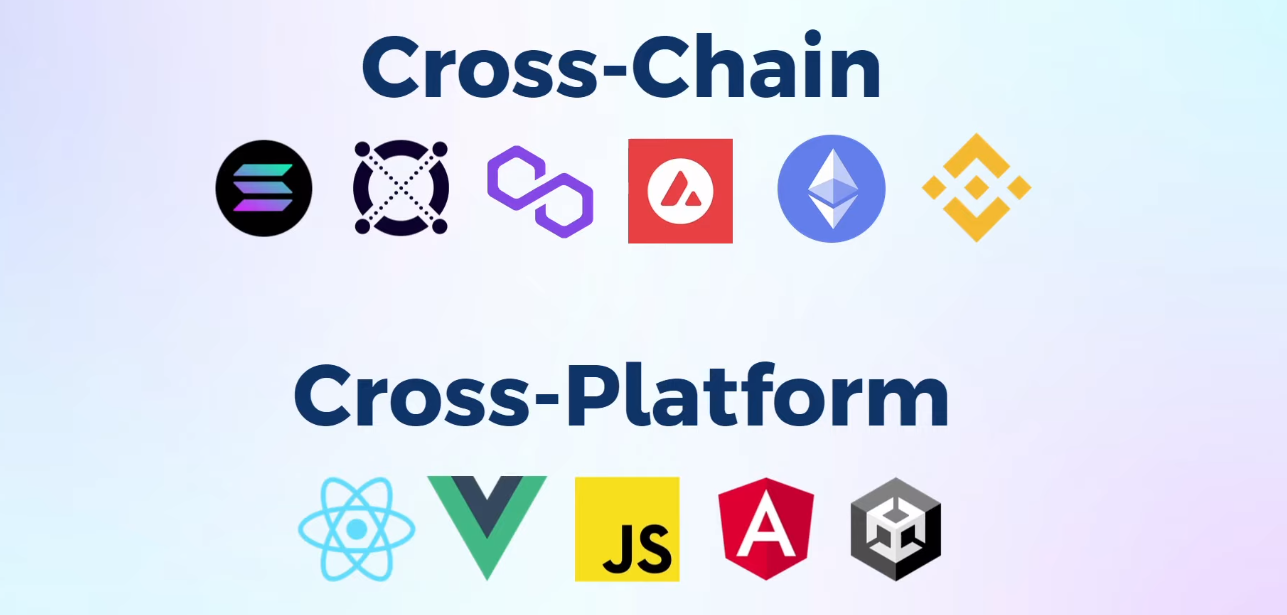
On prime of that, you additionally get to sync and index good contract occasions utilizing Moralis’ “Sync” characteristic. As well as, Moralis offers you with the last word Web3 SDK and highly effective APIs, together with the Ethereum API and NFT API. As such, you get to speak with that database simply. You also needs to notice that Moralis provides cross-chain and cross-platform interoperability. This provides you an opportunity to make use of your favourite platforms and broaden your attain throughout a number of networks. The latter additionally future-proofs your work since you aren’t restricted to any single blockchain.
Web3 Unity Metadata Importing Answer – Use Our Instance Dapp
Our instance dapp awaits you on GitHub. So, begin by downloading the mission and open it with Unity. As quickly as you do that, you’ll see the “Moralis Web3 Setup” panel:
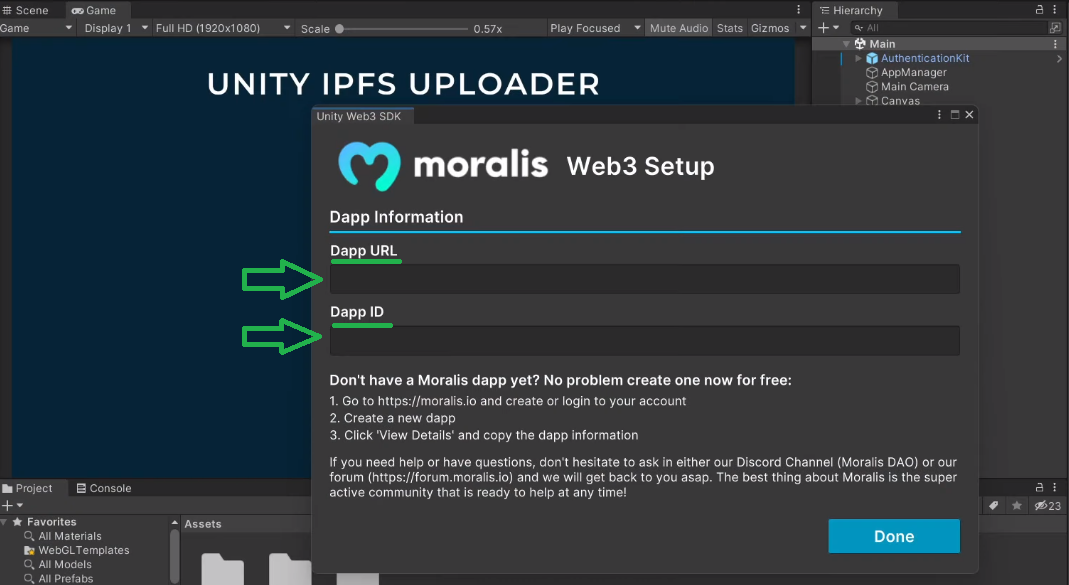
The above screenshot reveals you that the panel comes with directions. These embrace the next core steps:
- Creating your new Moralis account or logging in to your present account.
- Making a Moralis dapp. That is the place you create a Moralis server.
- Copying your energetic server’s particulars (server URL and app ID) into the above panel.
We determined to “take you by the hand” and stroll you thru the above steps to make issues as easy as doable.
Getting Began with Moralis
In case you haven’t accomplished so but, create your free Moralis account or use your credentials to log in to your account:

The “Servers” part of your Moralis admin space will allow you to create a brand new server. In case this isn’t your first rodeo with Moralis, the on-screen information will level you in the fitting path:

Subsequent, you’ll want to decide on your server kind:
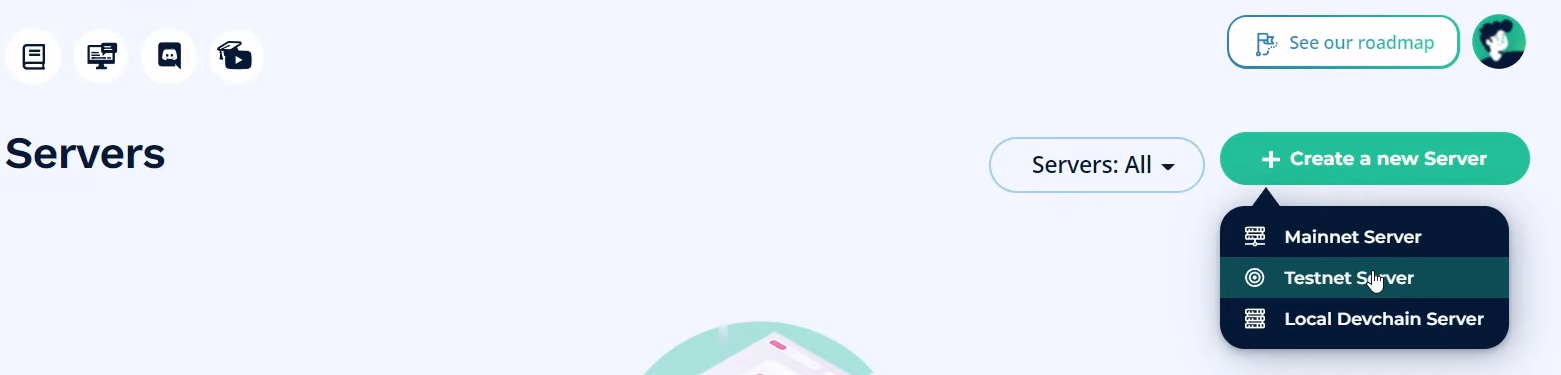
When engaged on instance initiatives or testing dapps, the “Testnet Server” choice ought to be your focus. Then, you’ll must enter your server’s particulars:

Begin by getting into a reputation (this may be something you need). Subsequent, choose the area closest to your location. Then, choose a sequence you wish to give attention to. Among the many testnets, you might have Ethereum testnets and several other different EVM-compatible networks (see the picture above). Lastly, begin your server by clicking on “Add Occasion”. As soon as your server is stay, you get to entry its particulars by way of the “View Particulars” button:

From a brand new pop-up window, copy the server URL and app ID:

Then paste the above-copied particulars into the “Moralis Web3 Setup” panel and click on on “Finished”:

Provoke Your Occasion of the Unity IPFS Uploader Dapp
When you’ve accomplished the above preliminary setup as instructed, now you can use our dapp. Therefore, click on on the play icon:
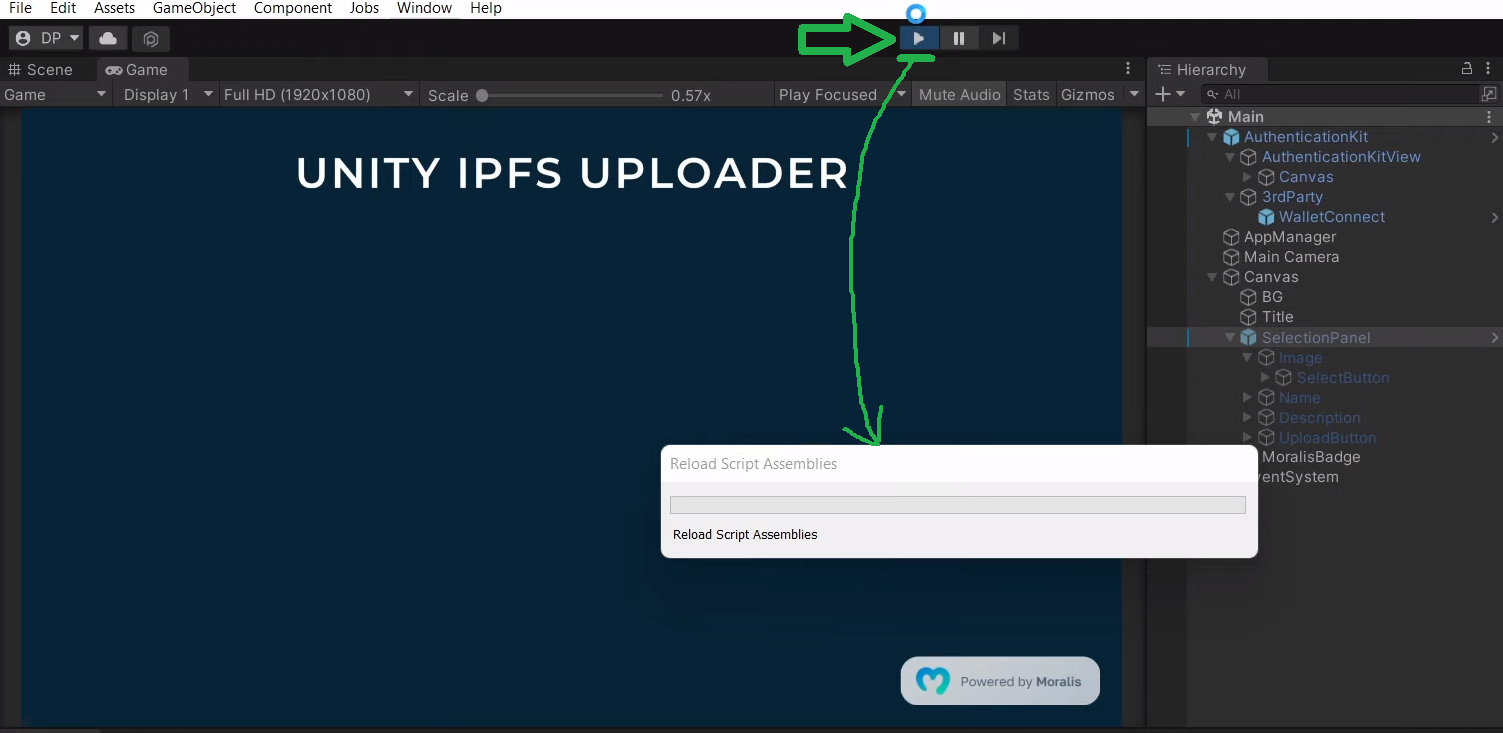
As soon as the reloading is completed, you will notice the “Join” button. When you keep in mind our demo, that is the place it began. Thus, you already know tips on how to use the “Unity IPFS uploader” dapp to add Web3 Unity metadata and information to IPFS.

Importing Web3 Unity Metadata – Code Walkthrough
There are two core facets to our dapp’s performance: choosing a file and importing the chosen file to IPFS. We are going to check out the scripts that energy every of those two capabilities. By doing so, you’ll have an opportunity to learn the way our dapp selects PNG information by way of the native Home windows file browser. Moreover, you get to see the fantastic thing about utilizing the Moralis SDK. In any case, it’s the energy of Moralis that makes importing Web3 Unity metadata as easy as doable.
“SelectionPanel” Script
Taking a look at our mission’s hierarchy, you possibly can see the “SelectPanel” object inside “Canvas”:
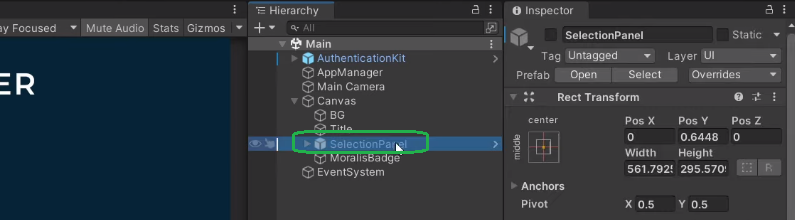
It’s this object that takes care of choosing pictures. Furthermore, “SelectionPanel” is robotically activated when customers log in efficiently. The latter is ready inside “AuthenticationKit”:
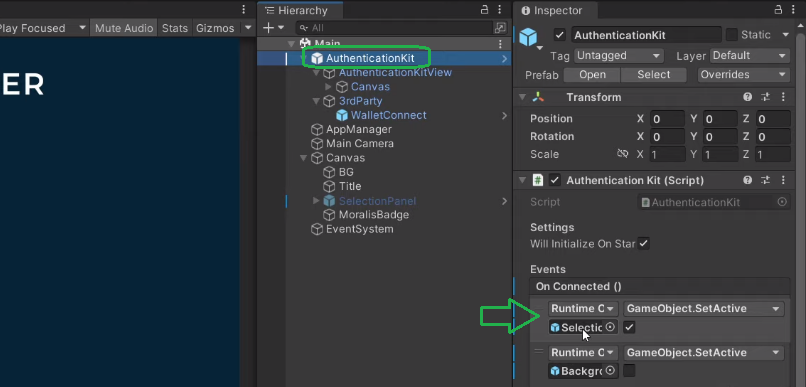
If we now focus our consideration on the “SelectionPanel” script, we should level out the “SelectImage()” operate. As soon as customers click on on the “choose” button, this operate carries essentially the most important function. Important, the “SelectImage()” operate opens the native Home windows file browser by way of the “OpenFilePanel” methodology:
_imagePath = EditorUtility.OpenFilePanel("Choose a PNG", "", "png");Notice: The above line of code is the place you’d want to use the required change to make use of our dapp for different sorts of information.
As soon as customers choose a file, the “SelectImage” operate makes use of the file’s path, reads all its bytes, and returns the picture information. Then, it creates a sprite from that picture information through the use of “LoadImage”.
“AppManager” Script
The subsequent step is importing the sprite, getting into “OnUploadButtonPressed()” (inside the “SelectionPanel” script):
        public void OnUploadButtonPressed()
        {
            if (picture.sprite == null || nameInput.textual content == string.Empty || descriptionInput.textual content == string.Empty)
            {
                Debug.Log("All fields (picture, identify and outline) have to be crammed");
                return;
            }

            UploadButtonPressed?.Invoke(nameInput.textual content, descriptionInput.textual content, _imagePath, _imageData);
            uploadButton.interactable = false;
        }
The above traces of code present that the “Add” button solely works when all three situations have been met. It turns into energetic solely after customers choose a picture (created a sprite) and enter their file’s identify and outline. The “AppManager” script takes issues over provided that all of the situations are met. The script contains the “UploadToIpfs” operate, which does many of the heavy lifting. This operate takes the file’s particulars and saves the file to IPFS. It first makes use of “SaveImageToIpfs” to add the picture file:
Record<IpfsFile> resp = await Moralis.GetClient().Web3Api.Storage.UploadFolder(requests);Wanting on the line of code above, you possibly can see the ability of Moralis. Because of its “UploadFolder” methodology, a single line of code uploads the picture to IPFS. Lastly, “AppManager” additionally ensures that the uploaded file’s metadata is created (“BuildMetadata”). Then, it leaves it as much as “SaveToIpfs” to add the Web3 Unity metadata file (“.JSON”) to IPFS. Final however not least, “AppManager” additionally resets the add button by way of the “ResetUploadButton” operate. This prevents customers from importing the identical information a number of instances.
In case you are extra of a video particular person, be certain that to look at this tutorial of our “uploader” dapp:
Importing Web3 Unity Metadata – Abstract
By making your approach by means of this text, you had an opportunity to discover ways to simply add Web3 Unity metadata to IPFS. Additionally, for those who adopted the above directions, you now have your personal occasion of our “Unity IPFS uploader” dapp. If that’s the case, it’s essential to have accomplished the preliminary Moralis setup, which implies you might be all set to sort out some instance initiatives. If creating Web3 video games is your cup of tea, we suggest utilizing our Unity tutorials. As such, you could go about connecting a Unity recreation with Web3 login, discover ways to join a Unity app to a Web3 pockets, and even construct a Web3 MMORPG. Then again, you could desire to make use of your JavaScript (JS) proficiency. In that case, you could wish to construct a superb 2D Web3 recreation or give attention to different dapps utilizing React.
You may entry our full scope of tutorials and articles on the Moralis YouTube channel and the Moralis weblog. A number of the newest matters embrace a dapp growth tutorial, a crypto sentiment dapp, blockend growth, tips on how to authenticate Solana customers with Phantom pockets, and creating an on-chain stock system. Furthermore, these two retailers may function your free and steady crypto training. Nonetheless, if you’re desperate to turn out to be a Web3 developer markedly faster and with confidence, you need to take into account a extra skilled method. That’s precisely what Moralis Academy provides. Other than top-notch blockchain growth programs, you’ll get a personalised examine path and skilled mentorship. Final however not least, additionally, you will turn out to be part of some of the advancing and welcoming communities within the trade.


